Apparently March is National Crochet Month, so I thought I’d kick off the craft box backlog with this crocheted Berber style basket. This project came from a MakeBox & Co kit from their monthly subscription range. I really like crocheted items, how they look and feel, and I have done several crochet projects in the past, but for some reason I don’t seem to be able to retain the technique in my brain so I have to re-teach myself every time. Usually it all comes flooding back once I start, although being left-handed I do have to either reverse the instructions provided or look up left-handed demonstration videos online. The printed instructions for this kit did jog my memory a bit but there was a couple of stitches I hadn’t done before. The photos and descriptions for these stitches weren’t very clear, but I found the YouTube video accessed via a QR code a lot more helpful. There’s loads of good crochet videos to be found online as well, my favourite is Wool and the Gang who have amazing resources for both knitting and crochet.
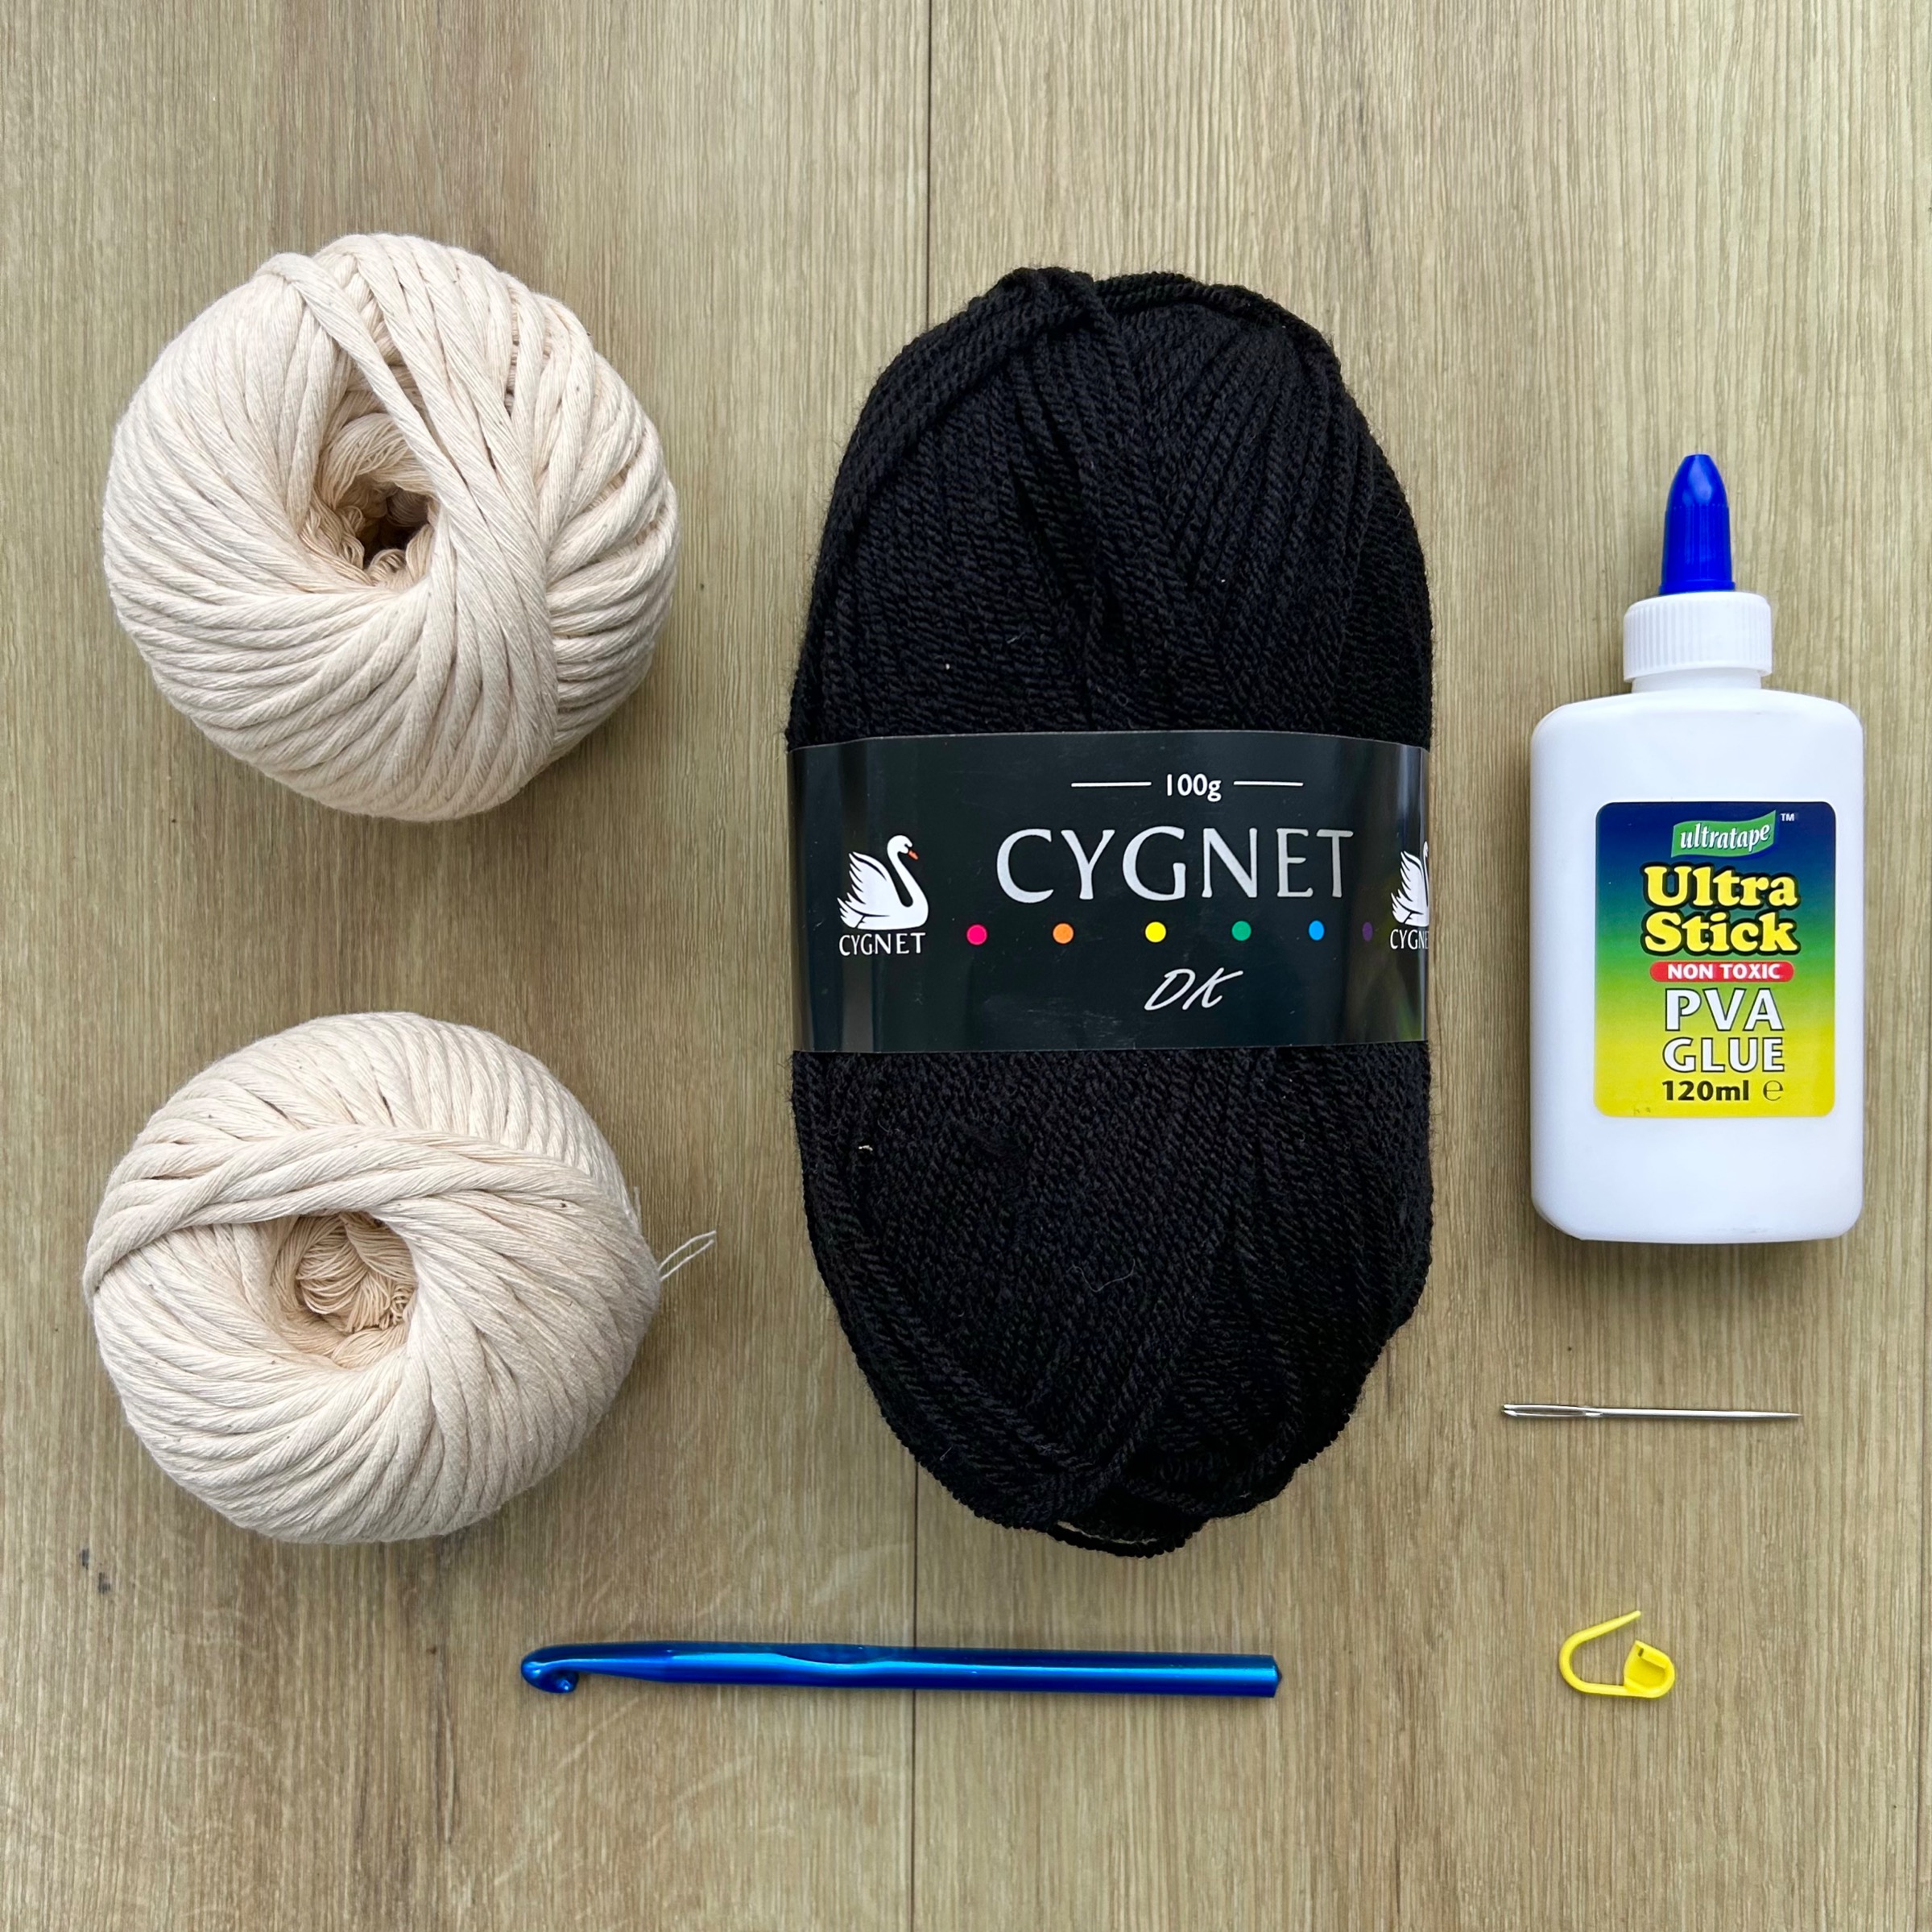
Included in the kit was:
- Macrame string x2 balls
- DK yarn (black)
- Crochet hook
- Darning needle
- PVA glue
- Stitch marker
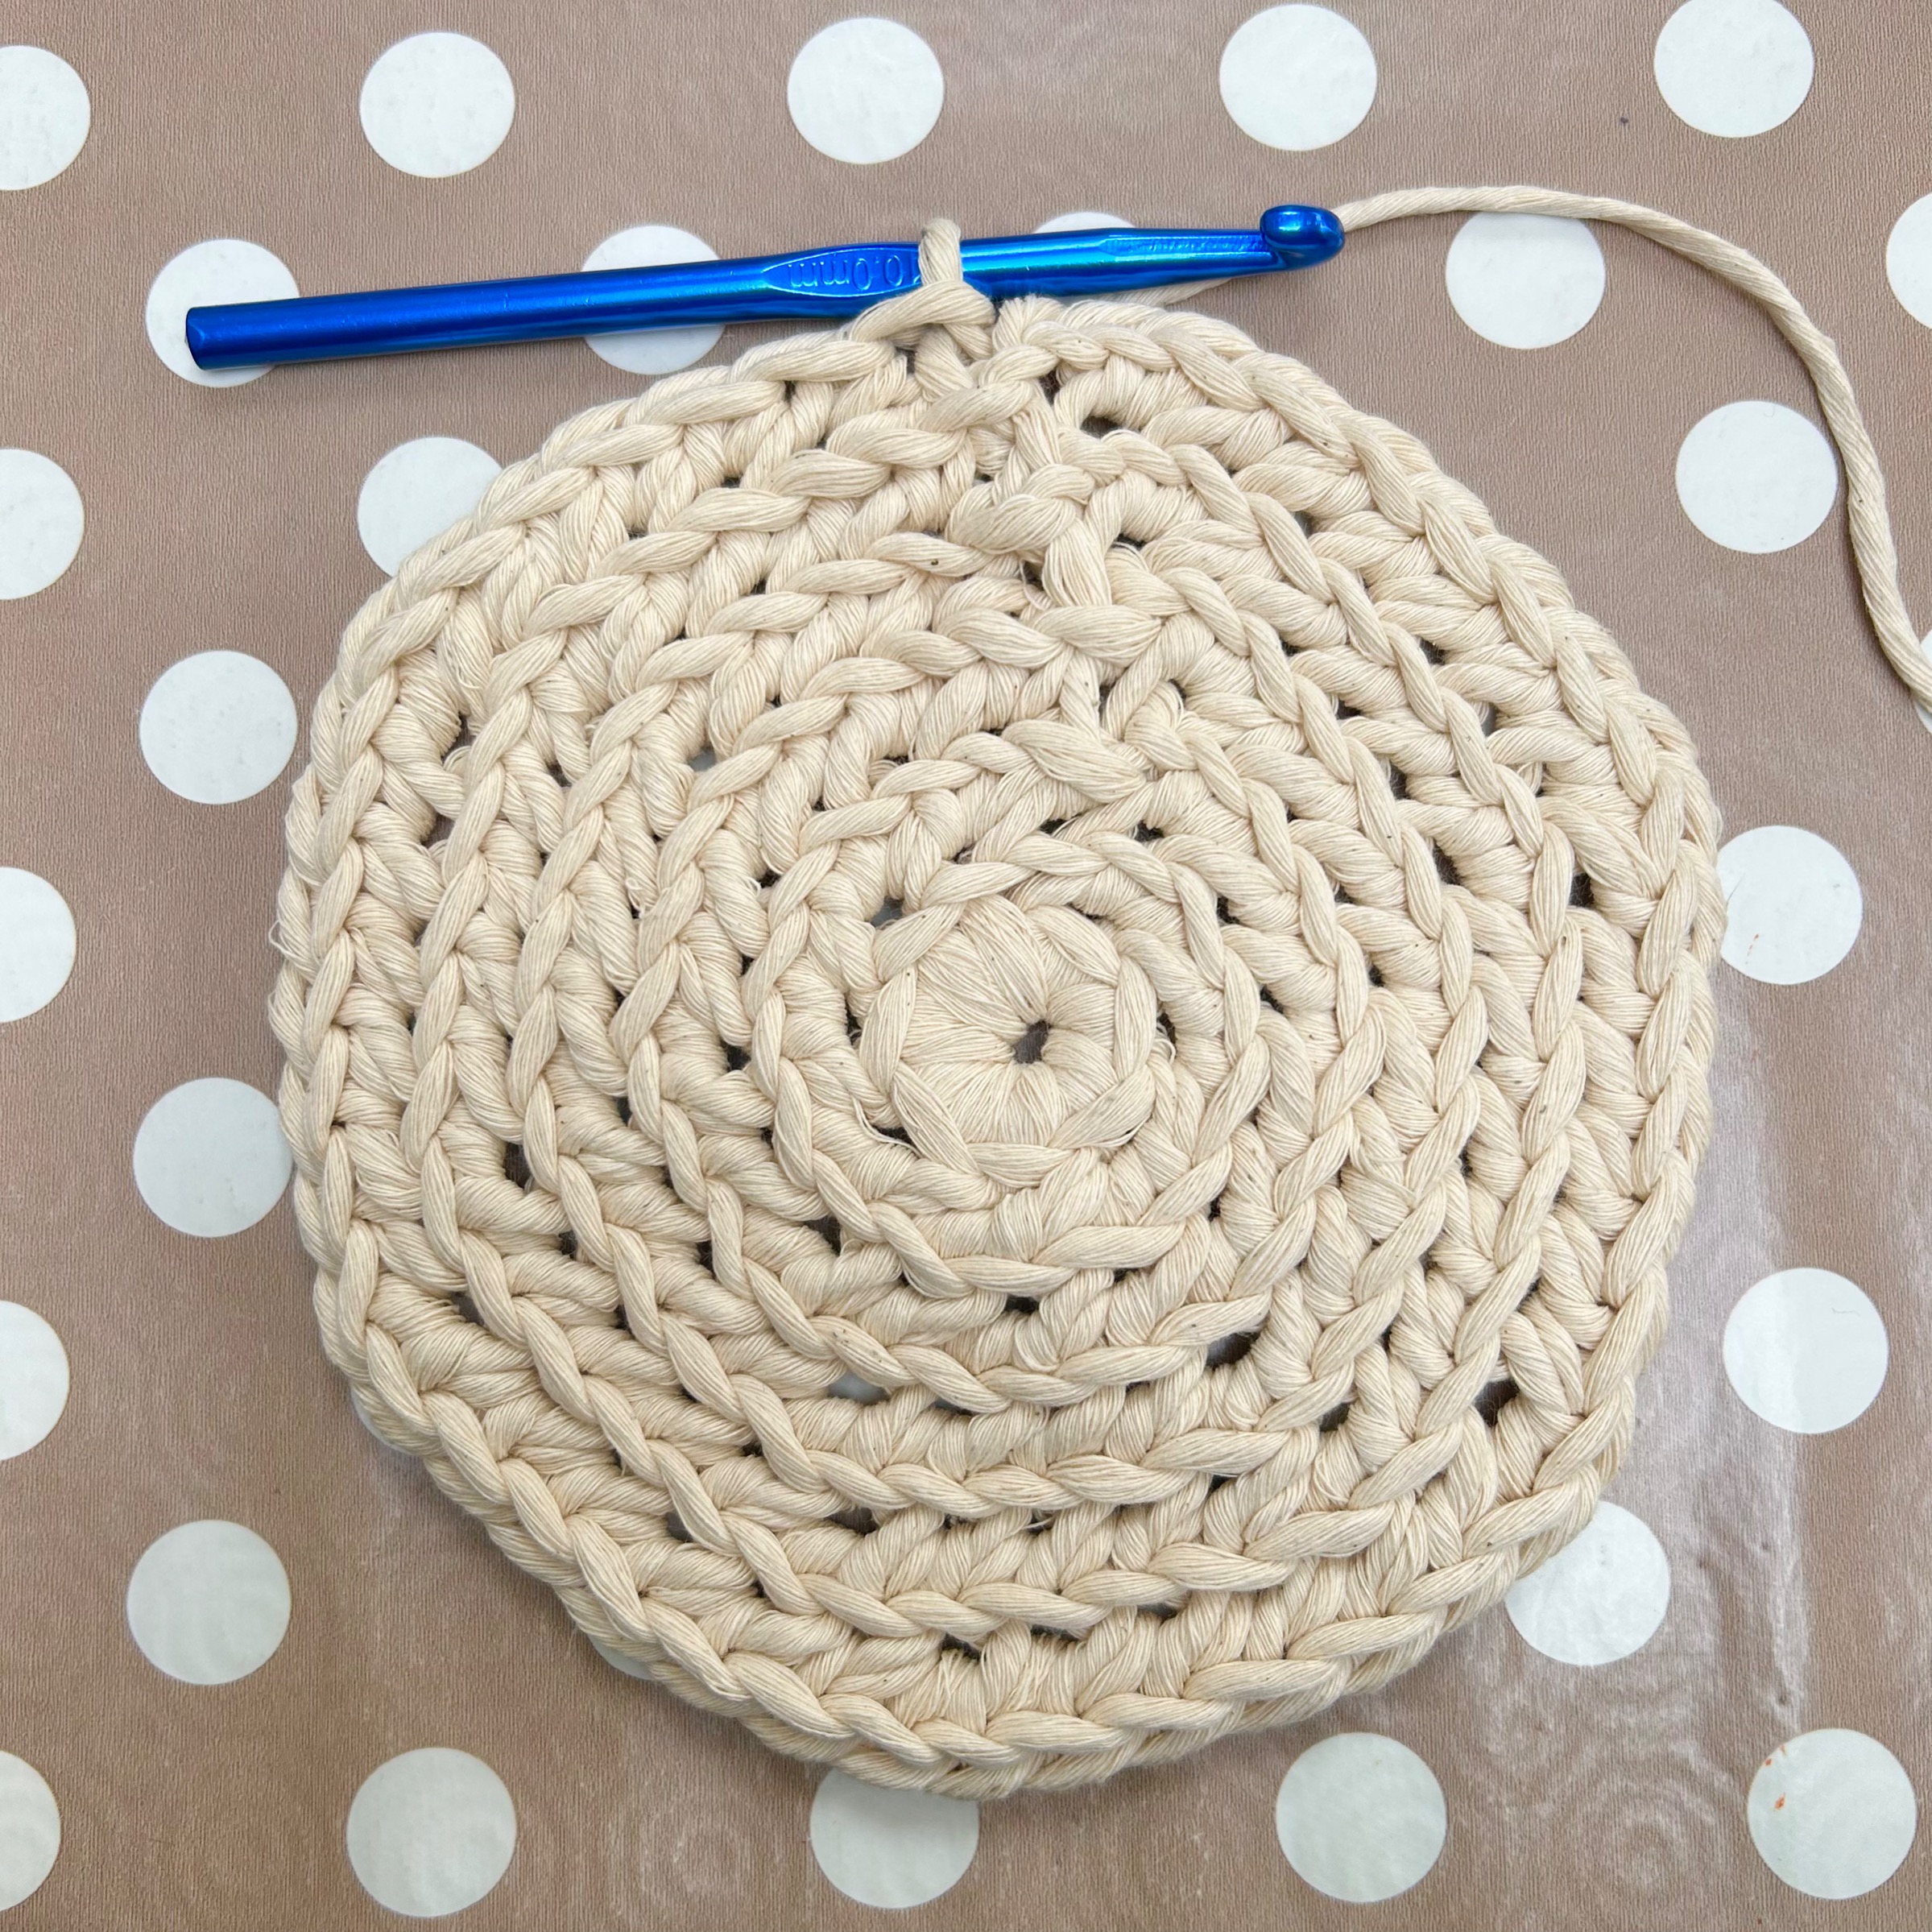
After starting the centre of the basket, the rest is pretty straightforward. It mainly consists of double crochet with a slip stitch at the end of every round. The most difficult bit is keeping an eye on the pattern and doing a lot of counting to ensure you keep on track as sometimes you need to work two dc into one stitch to create an even circle for the base. Building up the sides was even more straightforward, although I do find it helps to keep a tally of how many rows I’ve done because that is exactly the kind of thing I forget!
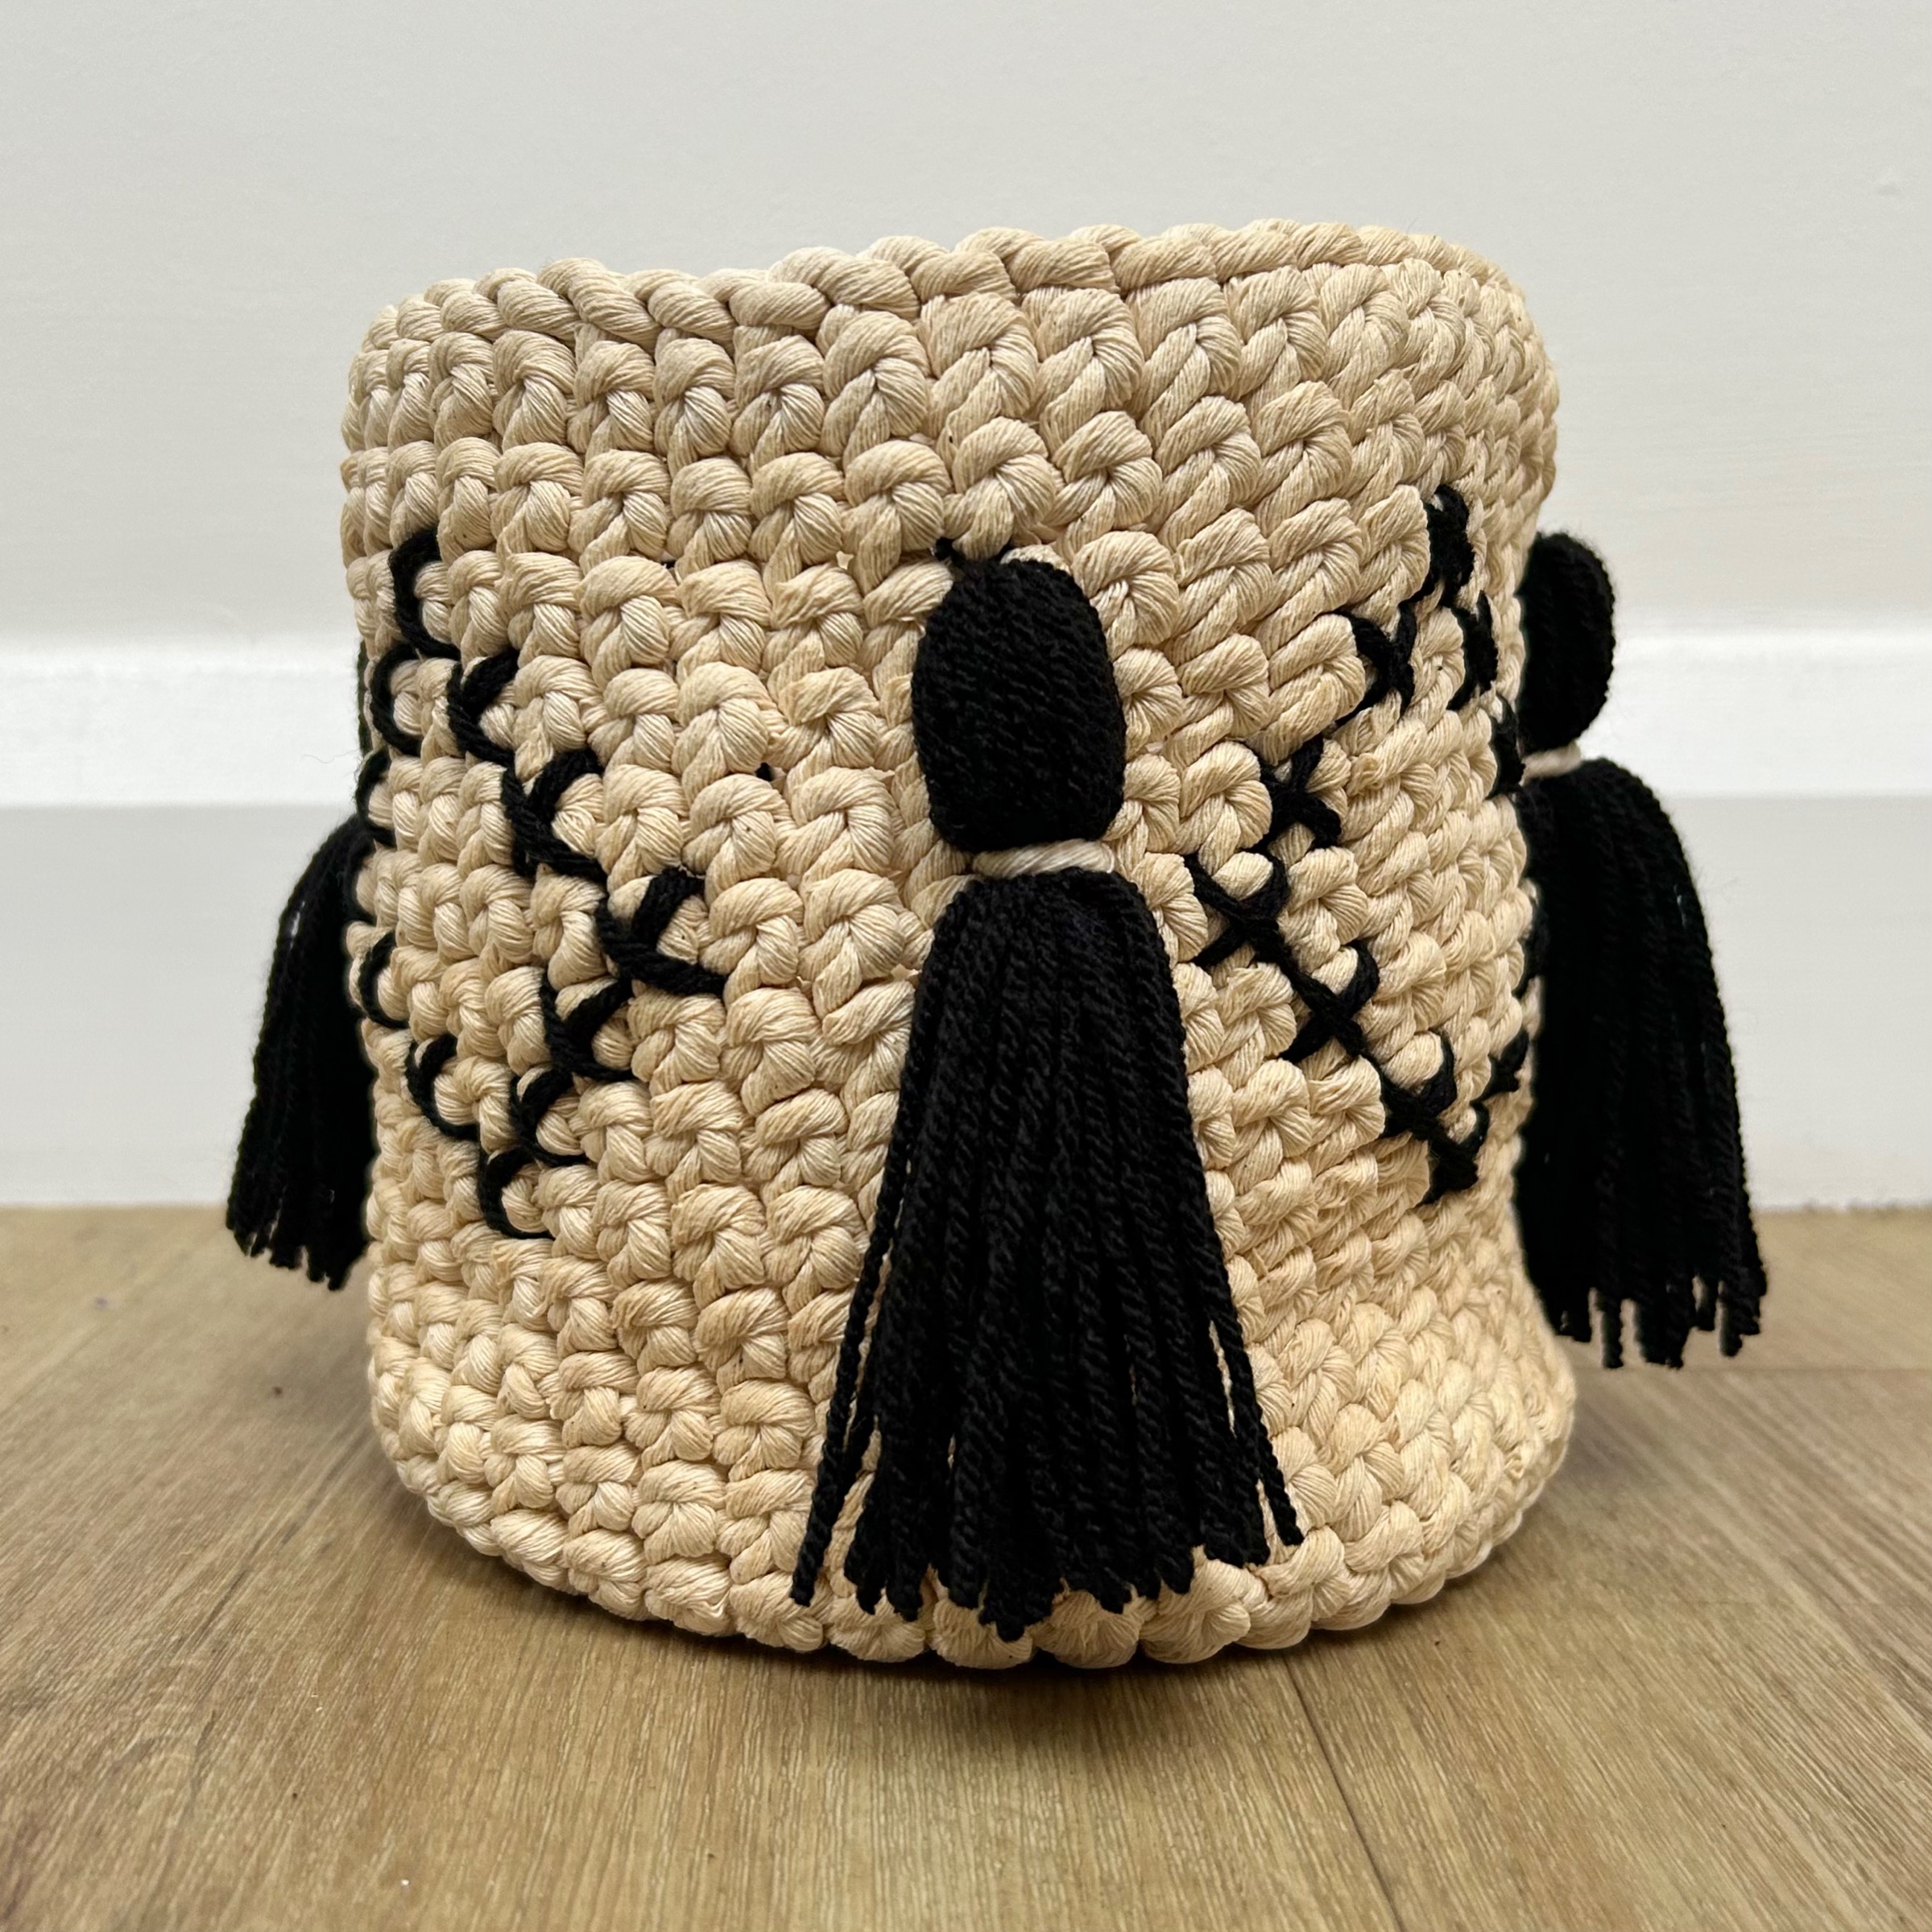
The most interesting part of this project for me was stiffening the basket so it would be freestanding. I was surprised at how floppy the finished crochet was as the macrame string it was made from seemed quite sturdy to me. The whole basket was soaked in a glue and hot water mixture and then left to dry. The drying took a long time and the basket needed adjusting and shaping every few hours. The instructions said there would be a lot of shrinkage, but that didn’t happen with mine, so to keep it upright whilst drying I made a tube out of thin cardboard so the sides didn’t slump too much. I haven’t done this before and it’s a good technique to have in the back of my mind for future reference.
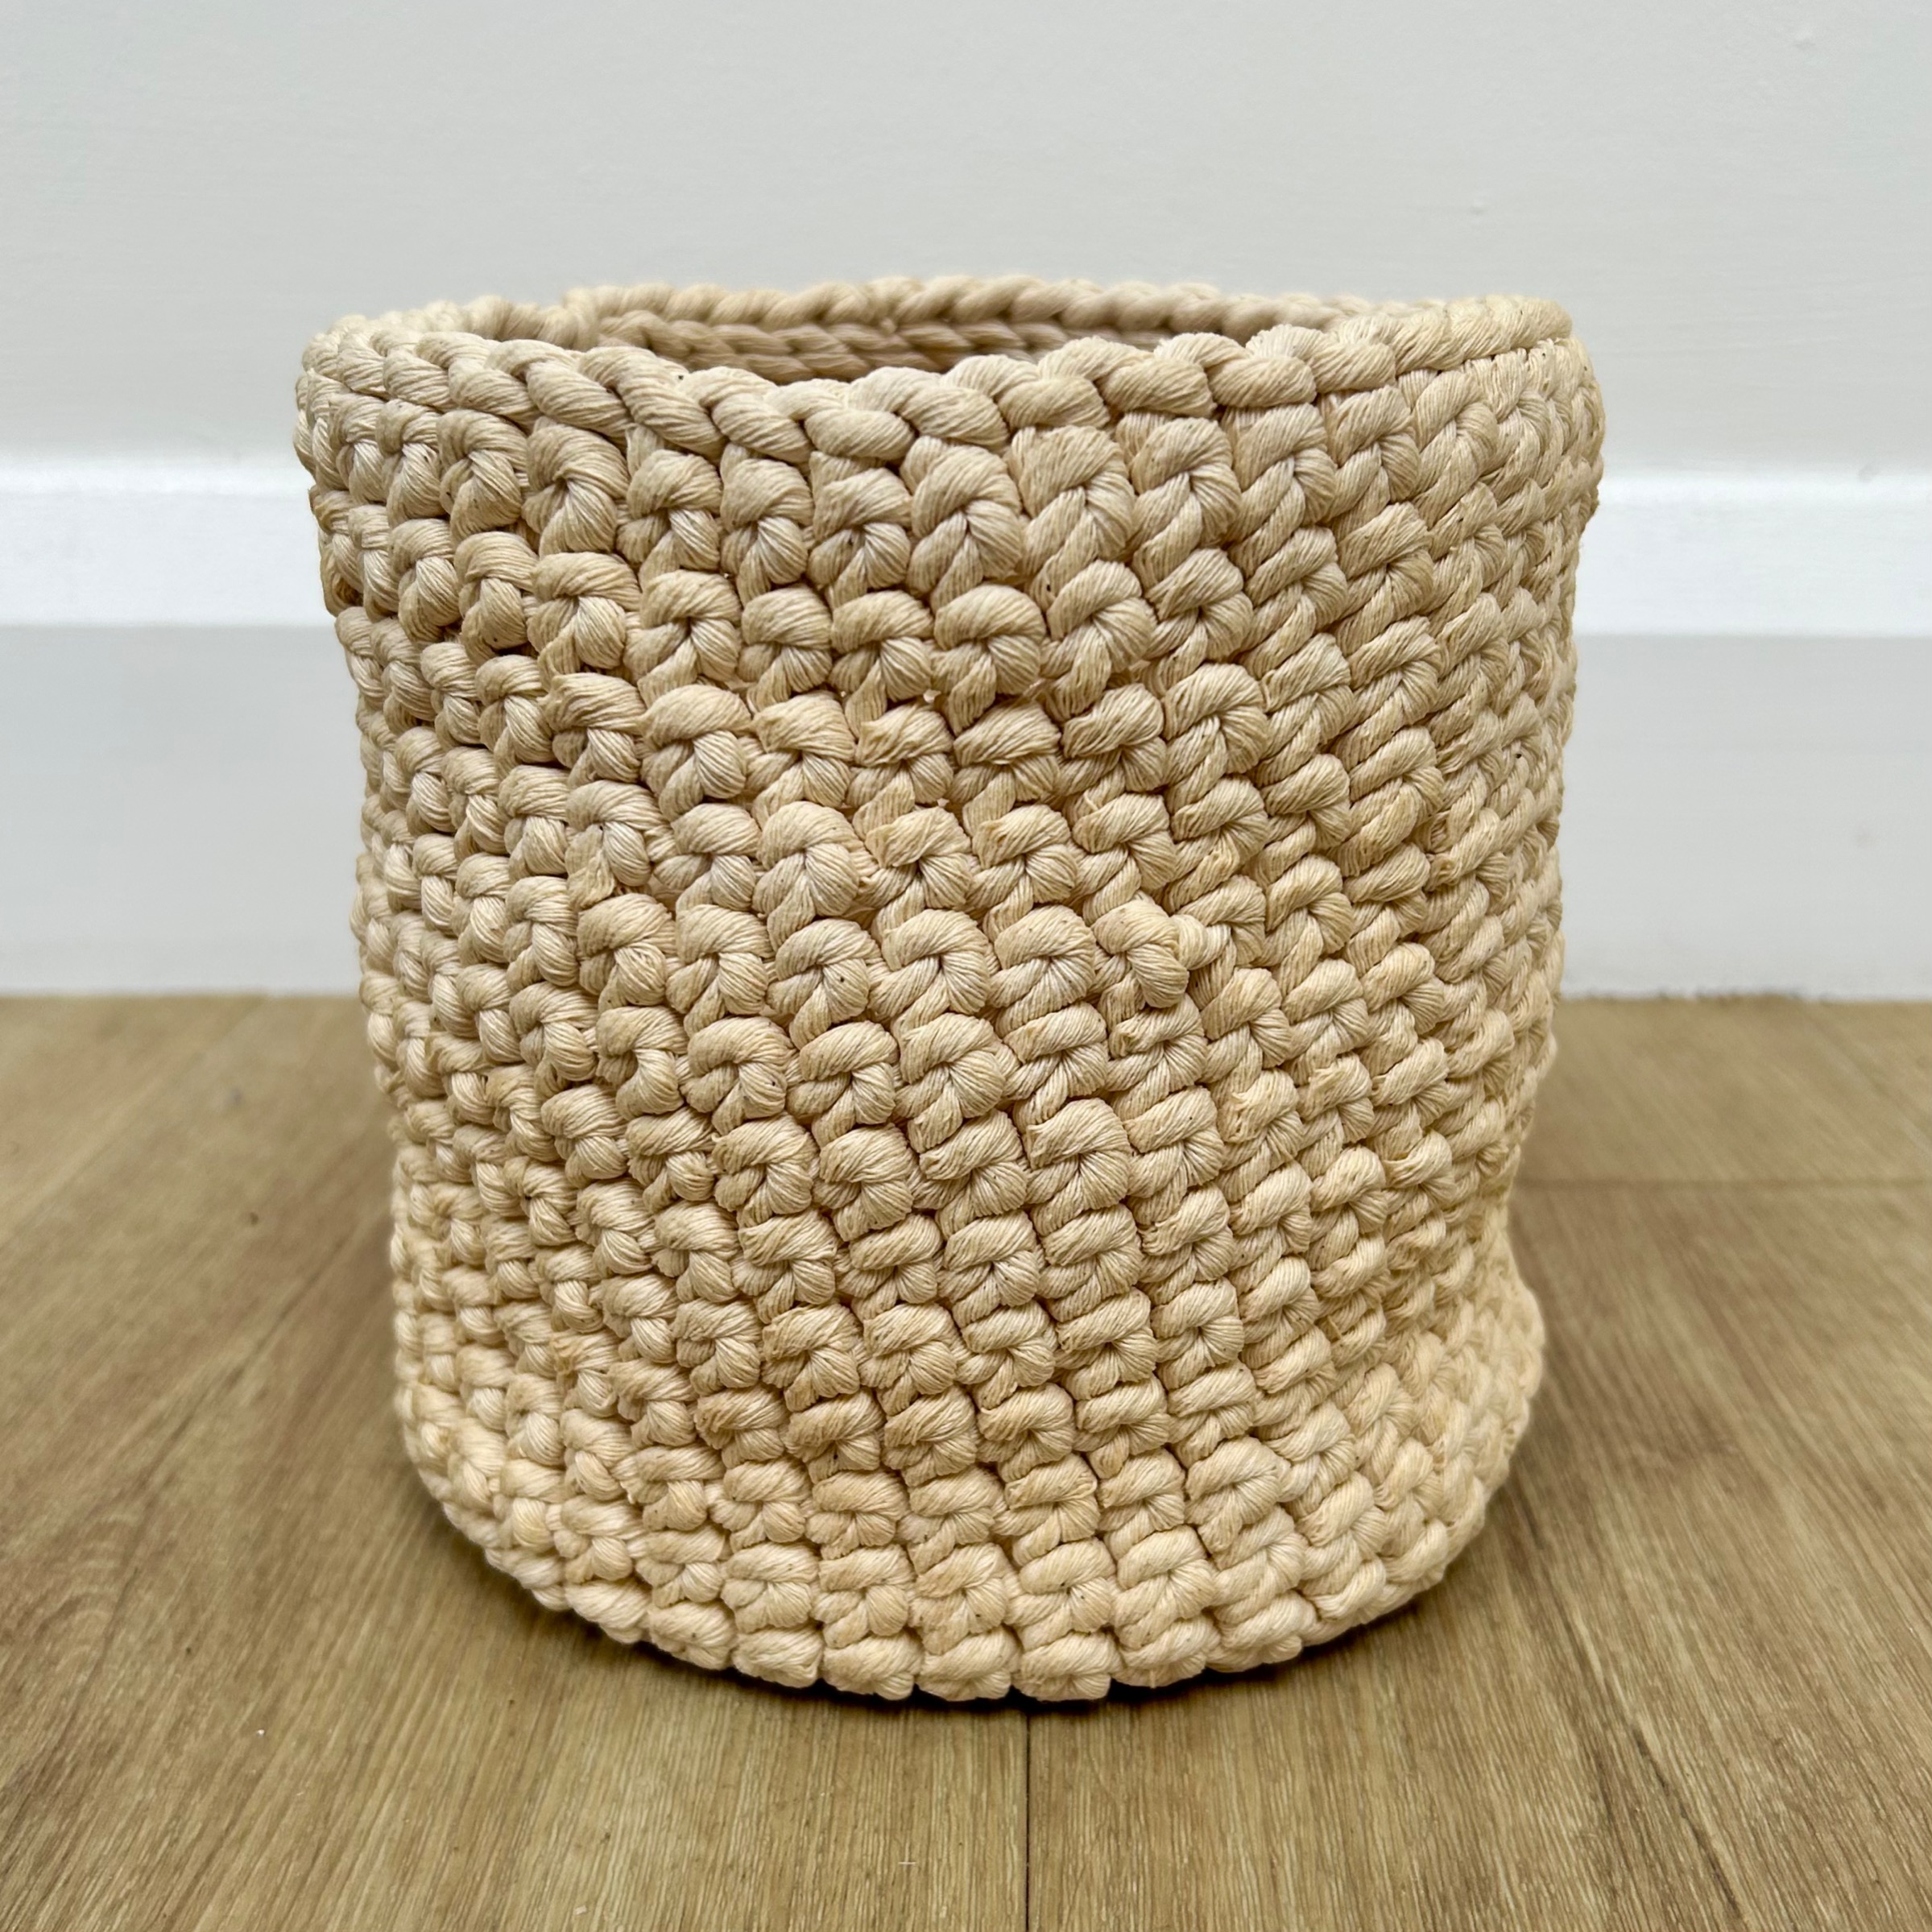
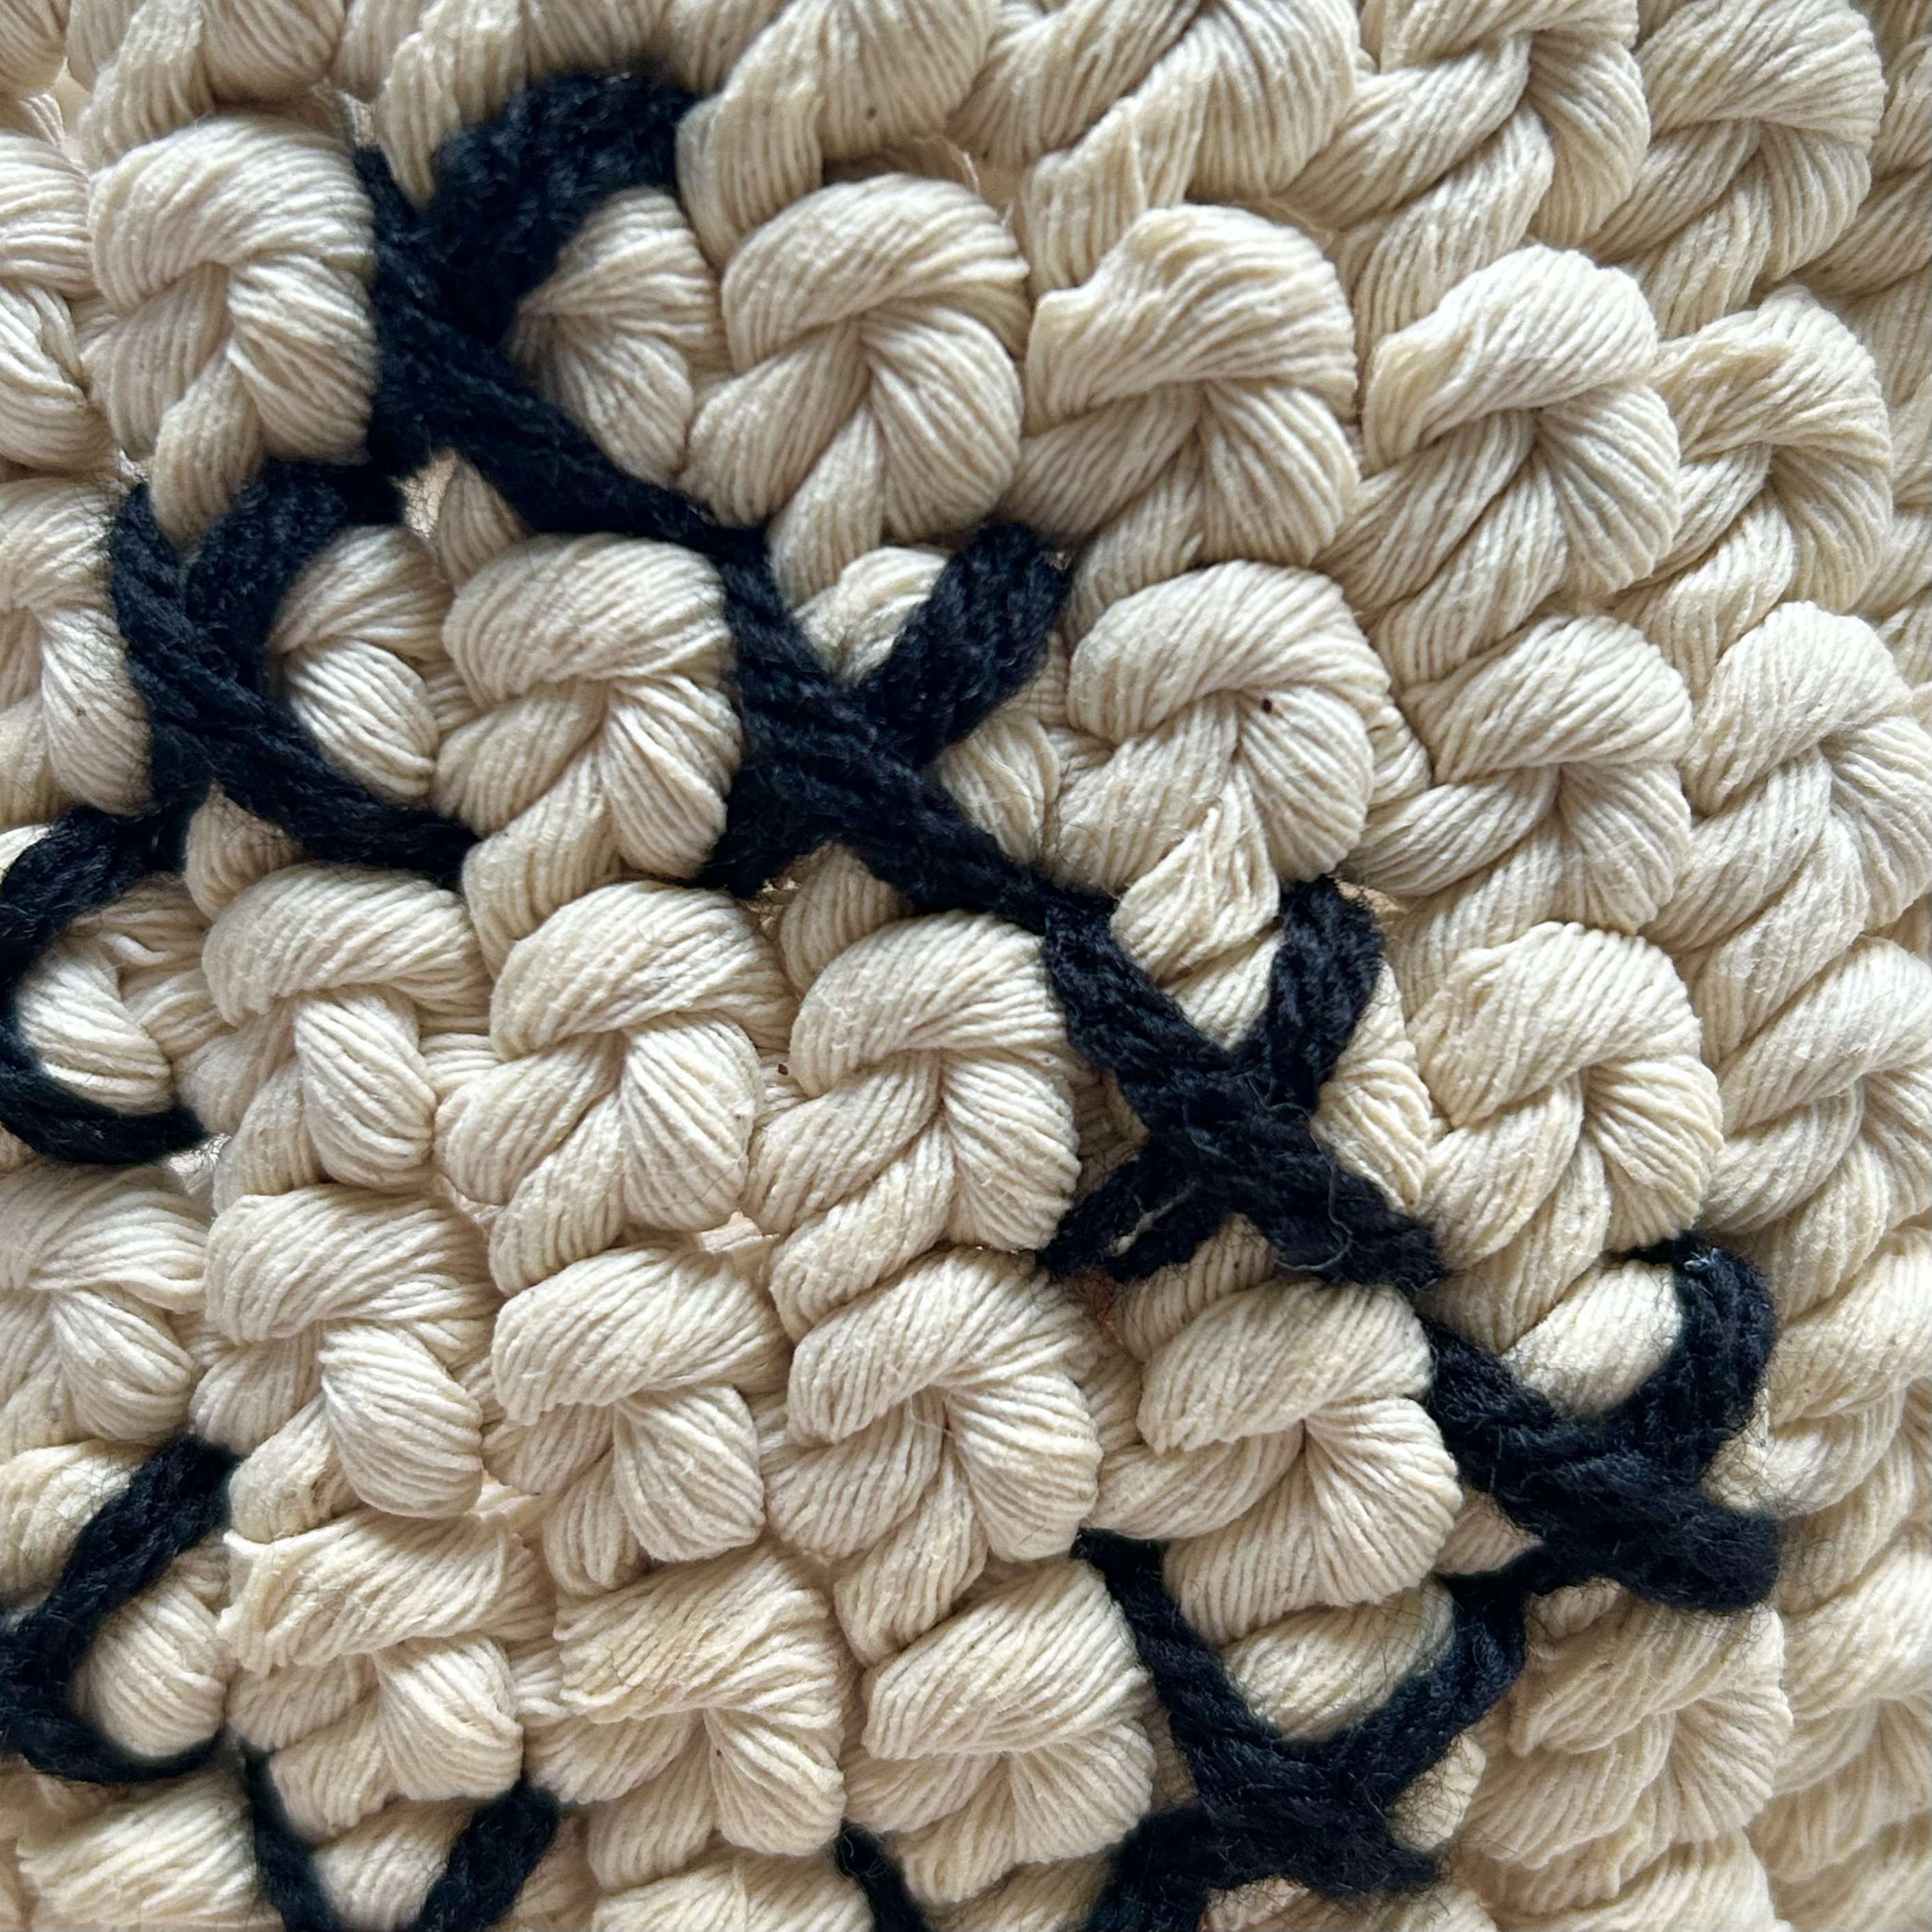
The last part of the project was the decoration. This was definitely worth doing as it really elevates the basket (and hides any mistakes!). I especially like the cross stitch using the crochet stitches as a canvas. It makes sense to use the grid structure of the basket to guide the decoration. There are also instructions on how to line the basket, but no materials provided for this as it’s optional. I haven’t lined mine because I haven’t decided how I’m going to use it yet.
This was a very satisfying project and the actual working time was only a few hours for the crochet and decorating sections. Obviously there was quite a long drying time, but as long as you aren’t in a rush to finish that’s fine.